
Manage and Configure Data Sources
Last updated
Note: Power My Analytics has updated the Sources page to make it easier to manage, configure, and monitor your connected data sources. This article will explain the features of the Sources section in your PMA hub and how to use it to manage your data source connections.
Using the Sources Page
Add a New Data Source
To connect a new data source to your Power My Analytics hub:
Visit hub.powermyanalytics.com to get started.
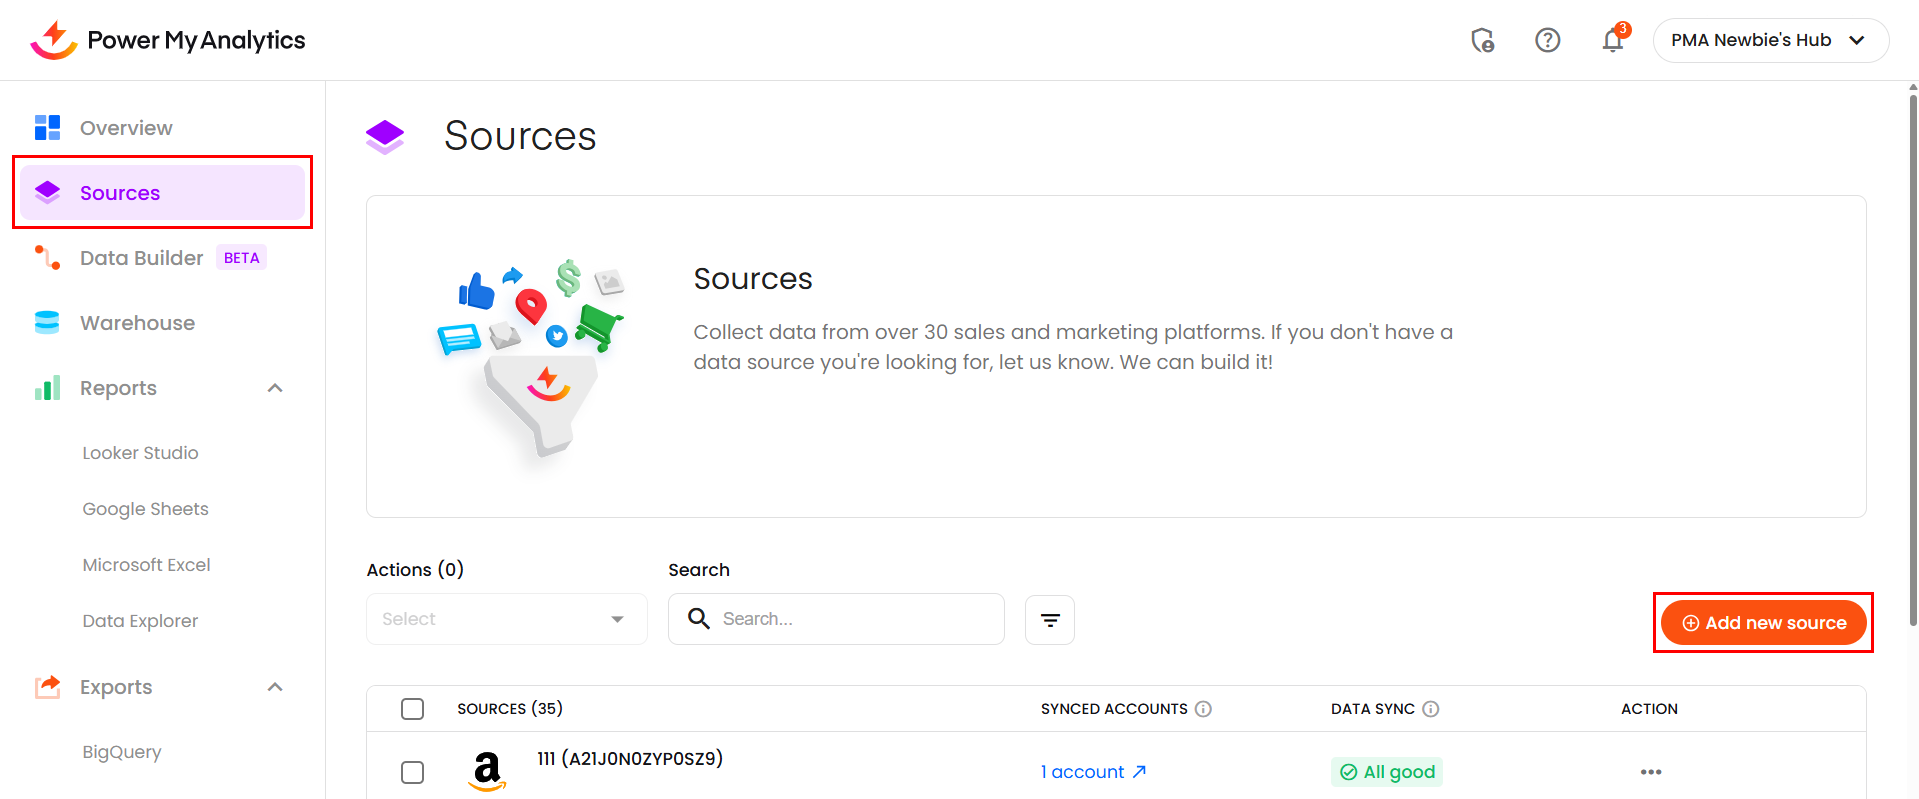
Click on Sources in the left navigation panel, then click the orange "+ Add new source" button located above the main sources table.
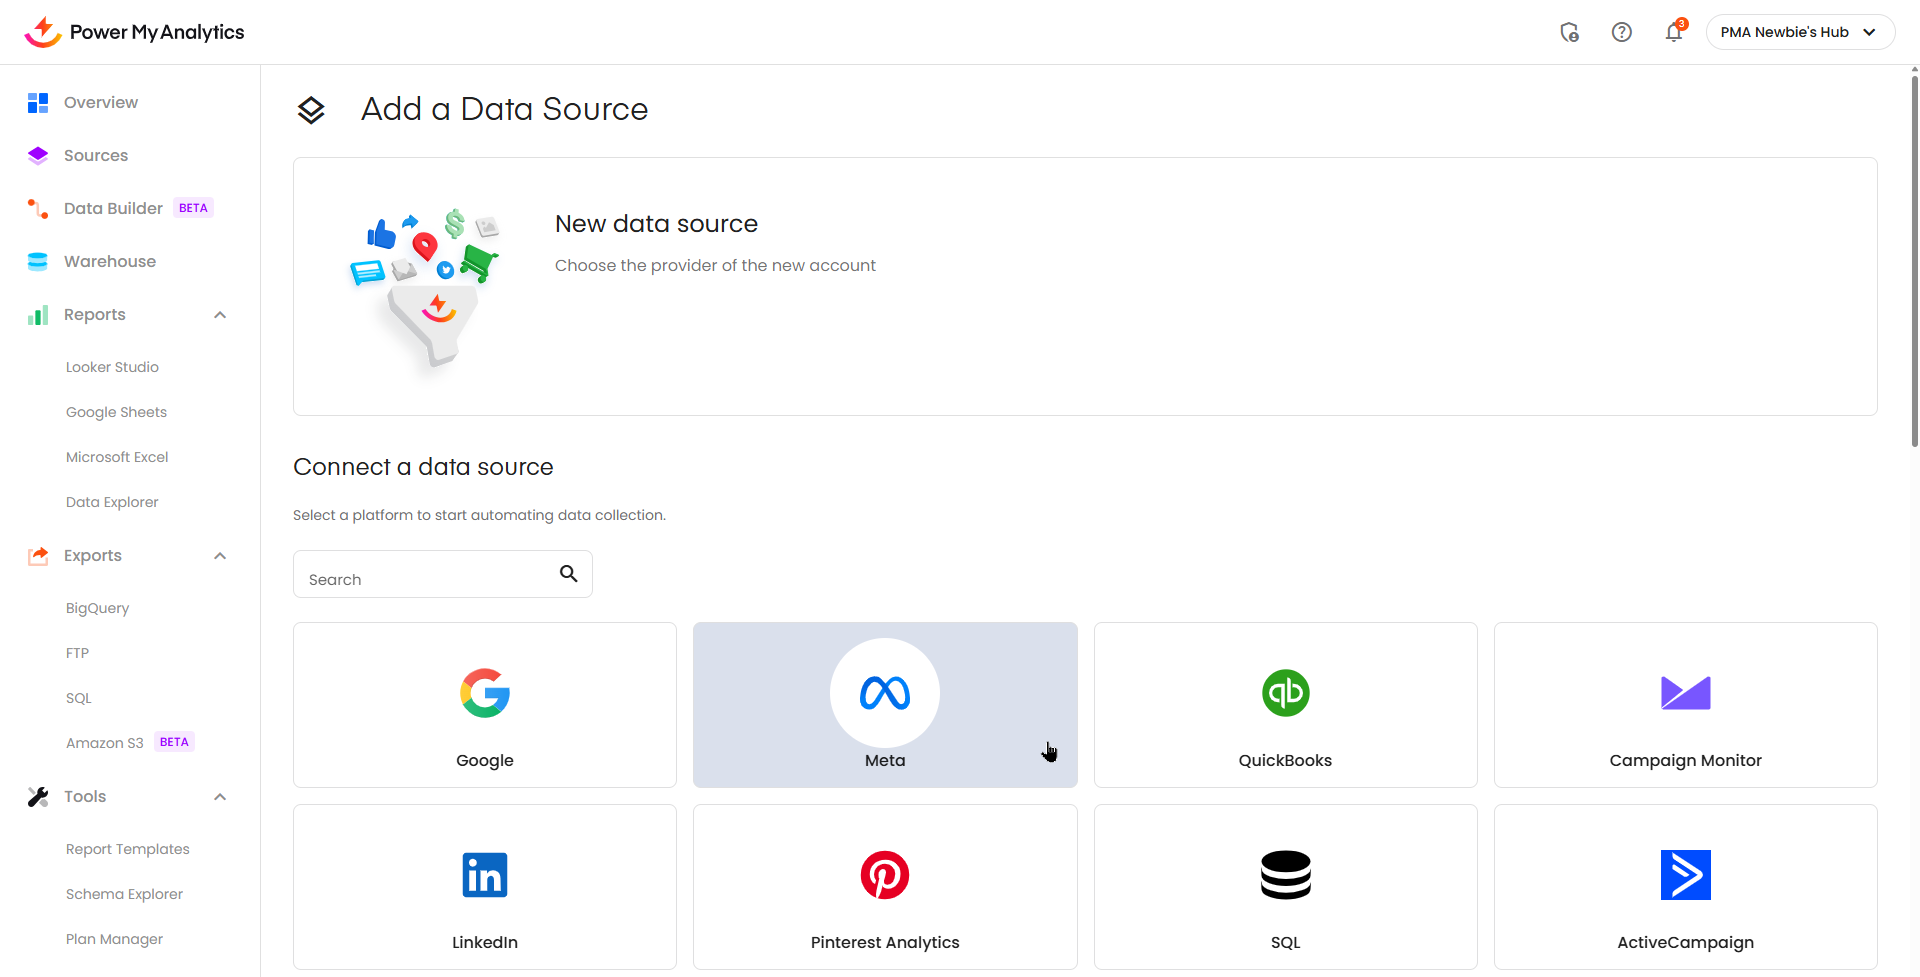
Select a connector from the data connector gallery.
Sign in with your credentials for your account on the chosen platform.
Grant Power My Analytics the required permissions to access your data.
Once connected, your new data source will appear in the main sources table and begin syncing data according to your configured schedule.
Data Sources Main Table
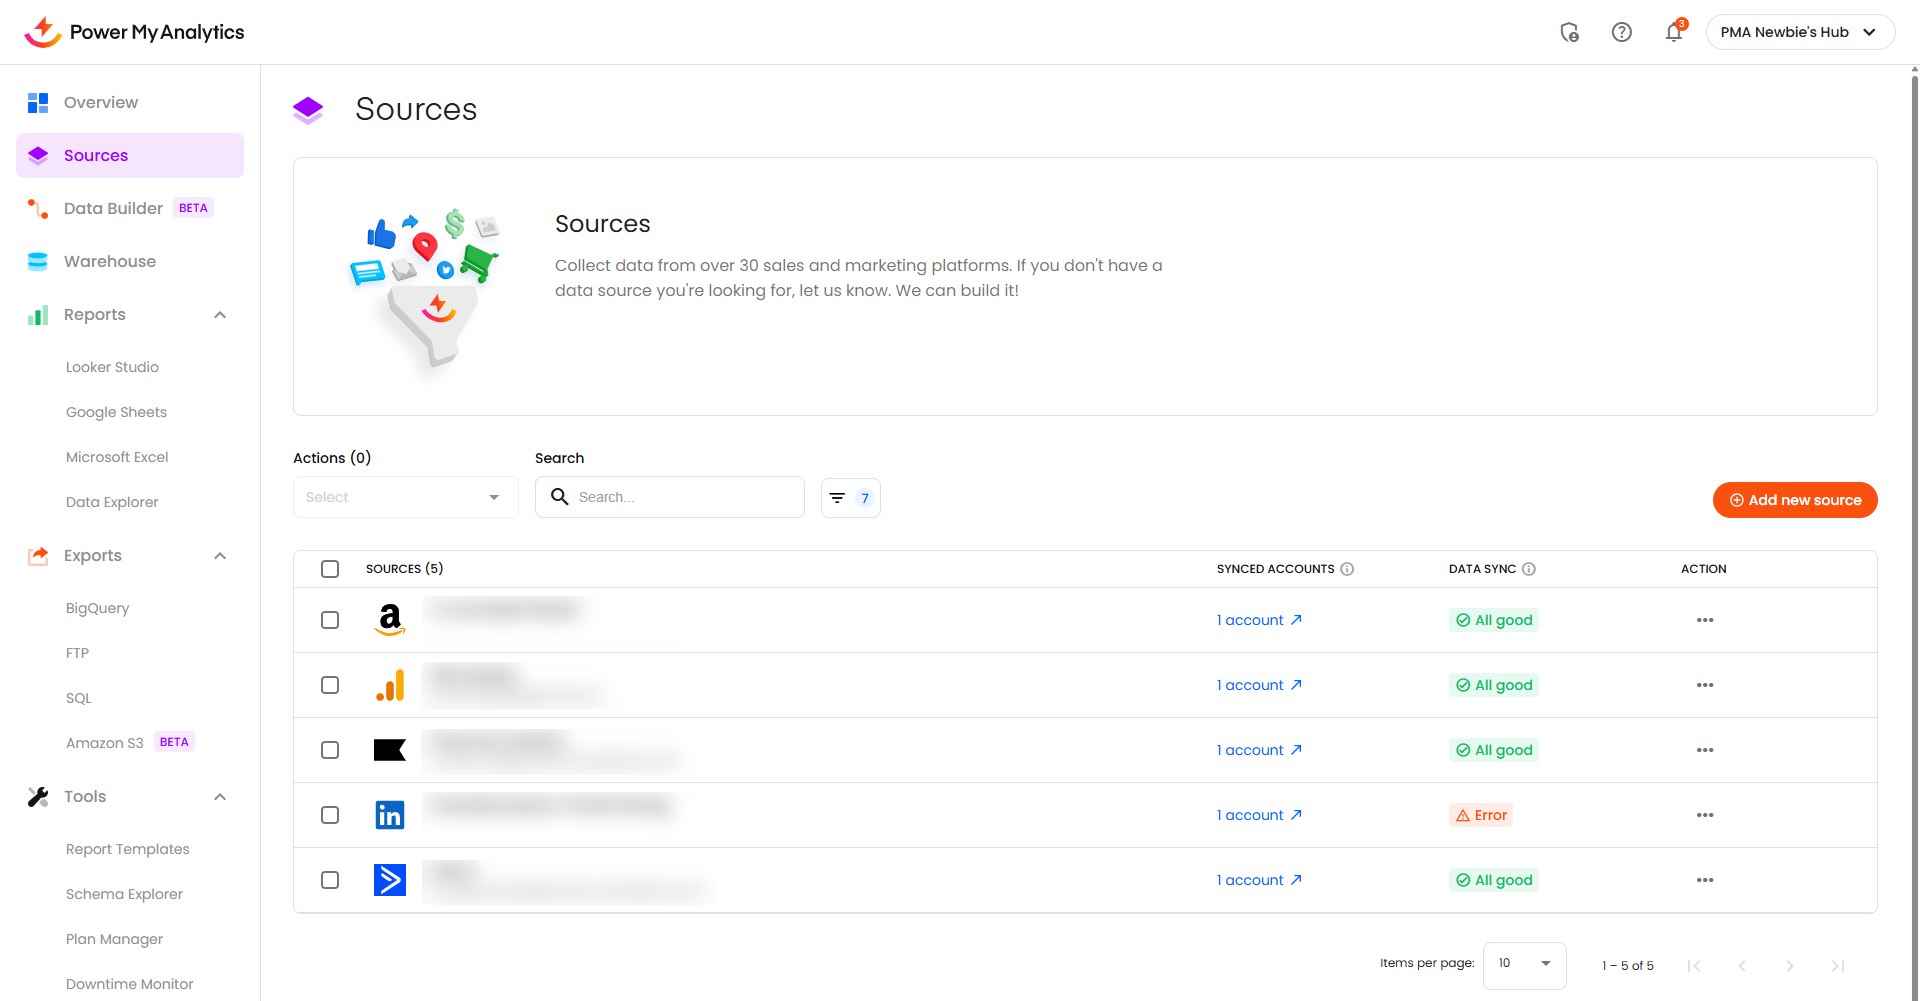
The main table displays all your connected data sources with the following information:
| Column | Description |
|---|---|
| Source Selection | Checkbox for bulk actions on all checked data sources |
| Platform | Icon of the connected platform (hover to see platform name) |
| Sources | Name, email address, and/or unique account identifier of the connected account |
| Synced Accounts | Number of accounts syncing within the data source, out of the accounts available to it (click the data source's row to view details in the Manage Accounts panel) |
| Data Sync | Current sync status of the data source. A source can display one or more status pills based on the sync state of its connected accounts. Possible statuses: Synced, Syncing, Reconnect, Lost Access, Missing Permissions, Resolving, Discontinued, Not Syncing, and No Accounts. |
| Actions | Three-dot menu with available actions for each source, or Reconnect button if the data source has the Reconnect status |
Understanding Data Sync Status
The Data Sync column in your sources table can display one or more status pills indicating the sync state of the data source's connected accounts. When accounts are in different states, the data source shows multiple pills side by side, each with a count of the affected accounts (for example, "Synced 179" alongside "Lost Access 31"). Hover on any pill to see a tooltip with the count and status name.
Possible statuses include:
- Synced: Data is syncing successfully.
- Syncing: A backfill is in progress.
- Reconnect: The data source needs to be reconnected.
- Lost Access: PMA has lost access to a specific account on the source platform.
- Missing Permissions: Required OAuth permissions are missing (currently applies to Google data sources).
- Resolving: PMA is automatically retrying after a failed data retrieval job.
- Discontinued: This data connector is deprecated and no new data will be synced.
- Not Syncing: No data sync jobs for the source have been performed in the last 24 hours.
- No Accounts: No accounts under the data source are currently active.
For full status descriptions and troubleshooting guidance, see Understanding Data Source Statuses.
Note: Data sync occurs daily at each data source's sync time: 3 AM in the data source's time zone by default. Ensure your sync time is set appropriately for your reporting needs.
Available Actions for Data Sources
Click the three-dot menu in the Actions column to access these options:
View account details: Open the Manage Accounts panel to view the accounts under the data source, their sync status, and account-level actions.
Add or remove accounts: Open the Edit Synced Accounts list to choose which accounts under the data source are synced. Shown for data sources that can have more than one account.
View Schema: Open the data source's connector in Schema Explorer to see its available fields.
Send to Data Studio: Start a Data Studio report with the data source's connector.
Edit sync time: Choose when the daily data sync starts: a time zone, an hour, or both. You can change the sync time once in a 24-hour period.
- Note: You can change the sync time for every connector. Instagram Stories are collected every hour, so the sync time doesn't apply to them.
Edit region and timezone (Awin only): Set each Awin account's region and timezone.
Backfill data range: Manually backfill historical data from the data source.
- Data range options: 24 hours, 7 days, 31 days, 3 months, 6 months, 1 year, or custom
Refresh accounts: Update the list of accounts the data source can access, so an account you were recently given access to on the platform can be turned on right away instead of after the overnight update. Shown for data sources that can have more than one account, and available once an hour for each data source. See Refresh the Account List for a Data Source.
Reconnect source: Re-establish connection for a data source that needs to be reconnected.
Remove source: Disconnect and remove the data source.
Bulk Actions on Sources
- Select data sources using the checkboxes in the main Sources table. The table's header row shows how many are selected.
- Click Remove in the header row to remove all of the selected data sources at once.
Search and Filter Sources
- Search: Use the search field to find specific data sources by name.
- Source Filter: Filter by specific platforms.
Each data source's current status is shown in the Data Sync column.
For more detailed information about specific data connectors, visit our connector documentation or reach out to our friendly support team.
Using the Manage Accounts Panel
The Manage Accounts panel provides detailed control over individual accounts within your connected data sources. This panel allows you to configure settings, enable or disable specific accounts, and manage data synchronization at the account level.
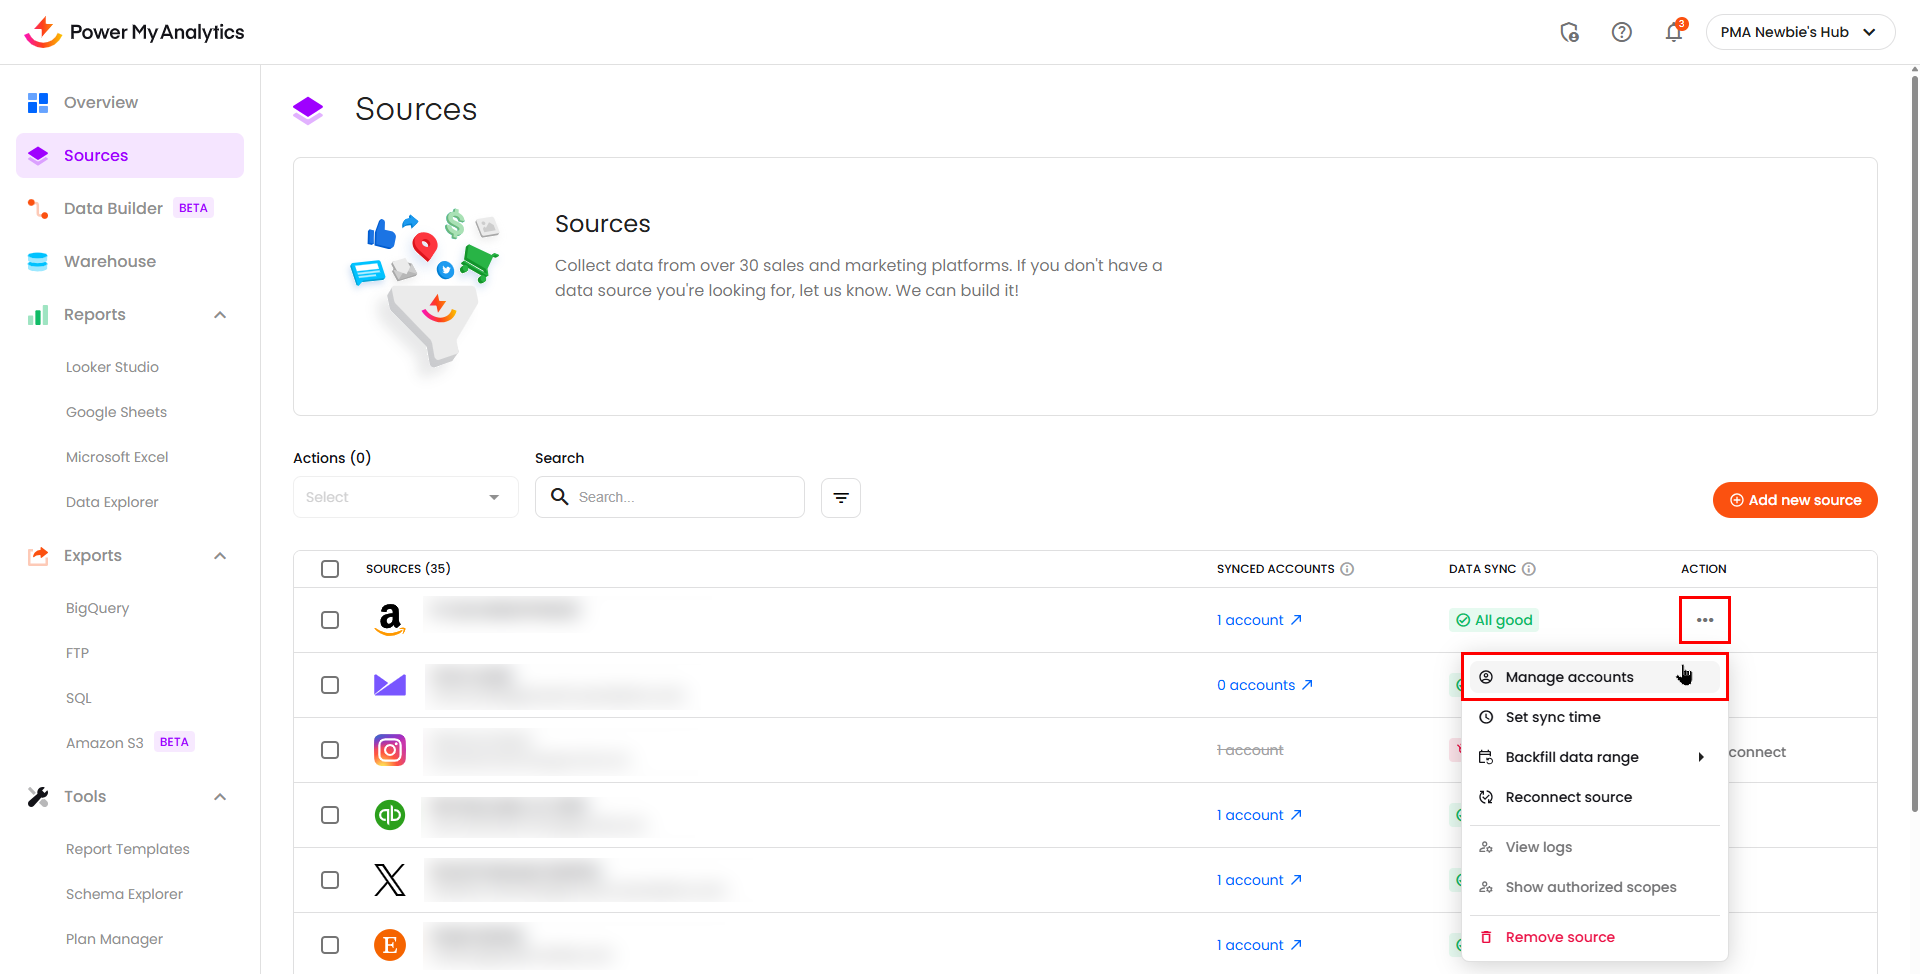
To open the Manage Accounts panel, click the data source's row in the main Sources table, or click the three-dot menu in the Actions column next to the data source and select View account details.
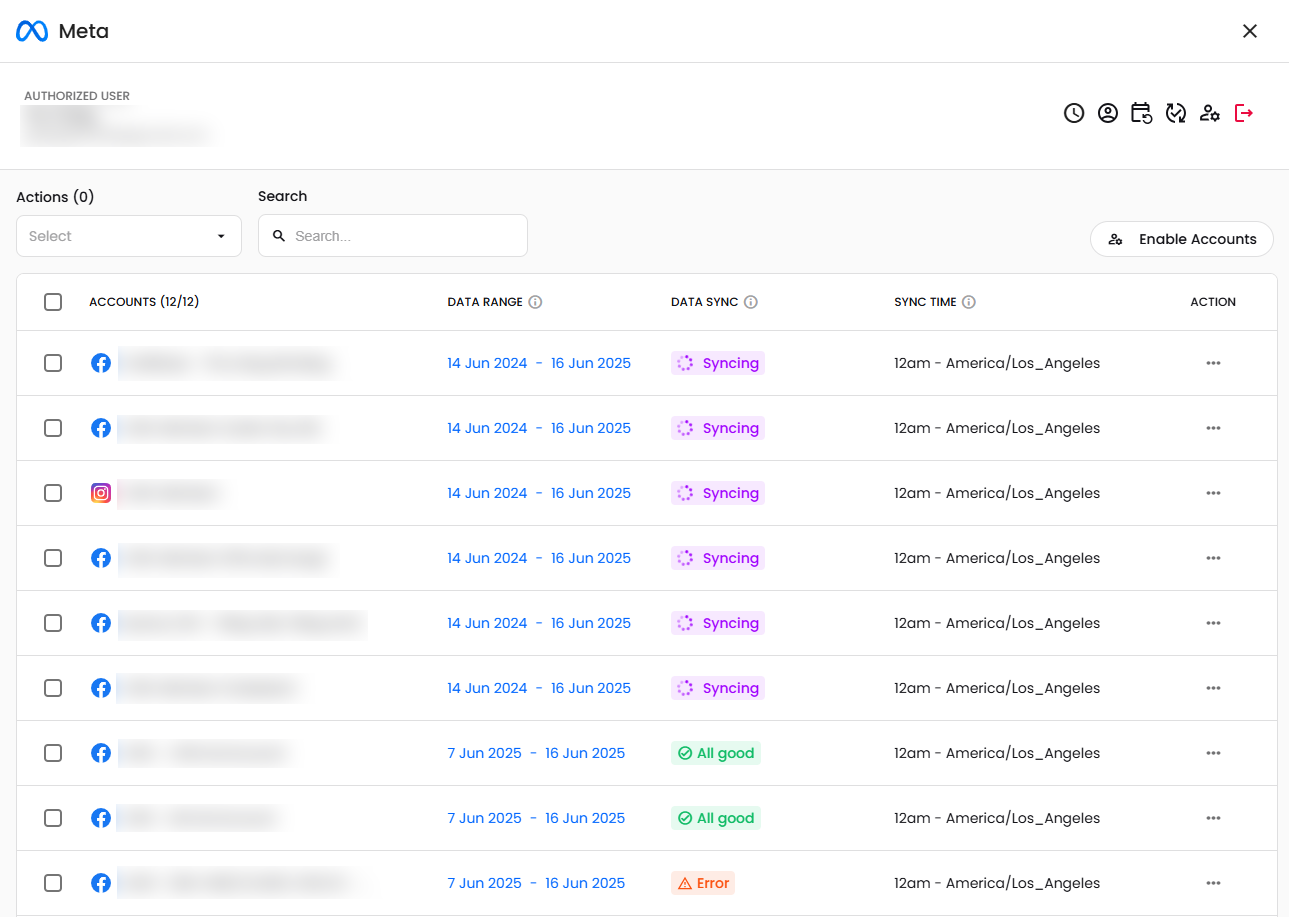
Manage Accounts Settings
At the top of the Manage Accounts panel, you'll find several settings and actions that apply to the entire data source.
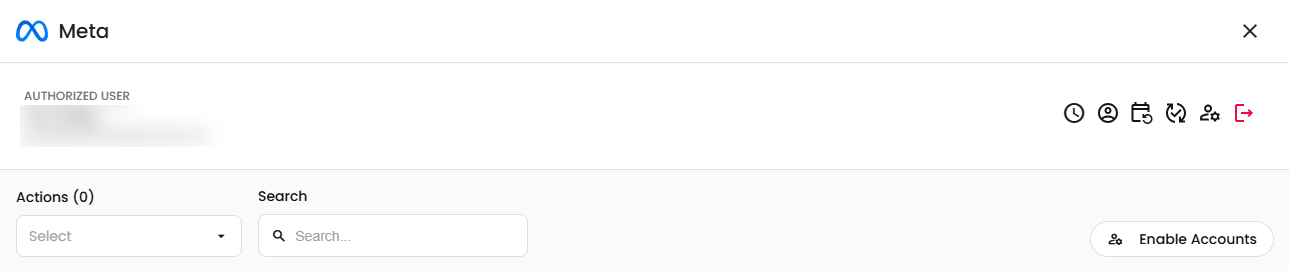
Authorized User (top left side of panel): Displays the name, email address, and/or unique account identifier of your account on the connected platform.
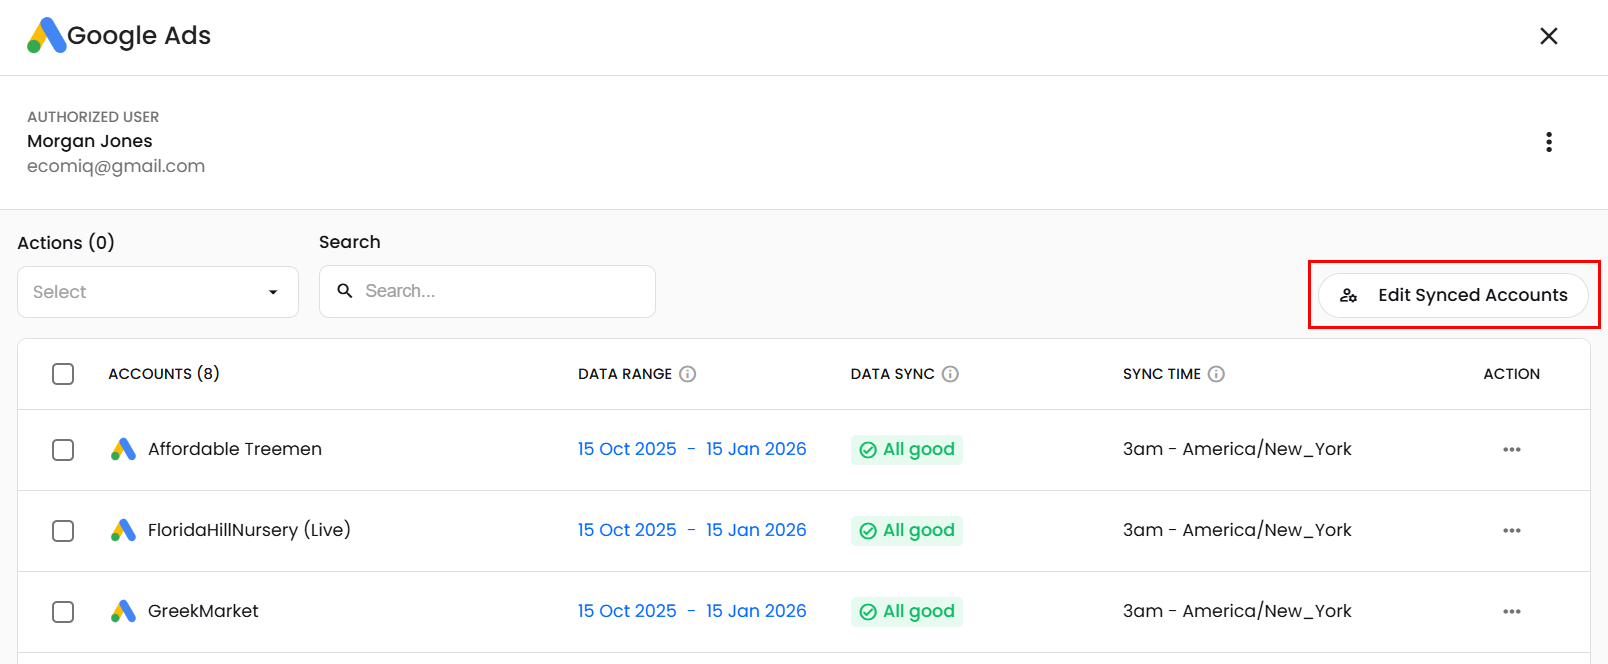
Add or remove accounts (button at the top right of the panel): Opens the Edit Synced Accounts list for choosing which accounts under the data source are enabled or disabled. This button doesn't appear for single-account connectors (data sources that can only have one account).
Three-dot menu (in the panel header): Opens a menu of source-level actions:
- Send to Data Studio: Start a Data Studio report with the data source's connector.
- Add or remove accounts: Open the Edit Synced Accounts list.
- Edit sync time: Choose the time zone and hour at which the data source's daily data sync starts, applying this setting to all accounts under the data source.
- Edit region and timezone (Awin only): Set each Awin account's region and timezone.
- Backfill data range: Perform an immediate backfill of all accounts under the data source for the range you choose.
- Refresh accounts: Update the list of accounts the data source can access.
- Reconnect source: Immediately disconnect and reconnect the data source and all accounts included under it.
- Remove source: Disconnect and remove the entire data source.
You can also perform actions on multiple accounts simultaneously:
- Select accounts using the checkboxes in the Manage Accounts main table.
- Click the Actions dropdown menu at the top left of the panel.
- Choose Remove account(s) to delete multiple selected accounts at once.
Additionally, use the Search field at the top of the panel to quickly find specific accounts by name when working with data sources that have many connected accounts.
Add a New Account in a Connected Data Source
If you have a connected data source that contains multiple accounts (such as Facebook Ads with multiple ad accounts or Google Business Profile with multiple locations), you can enable additional accounts that are not currently active in your data source connection.
Navigate to your Sources page in your Power My Analytics hub.
Locate the data source containing the account you want to enable.
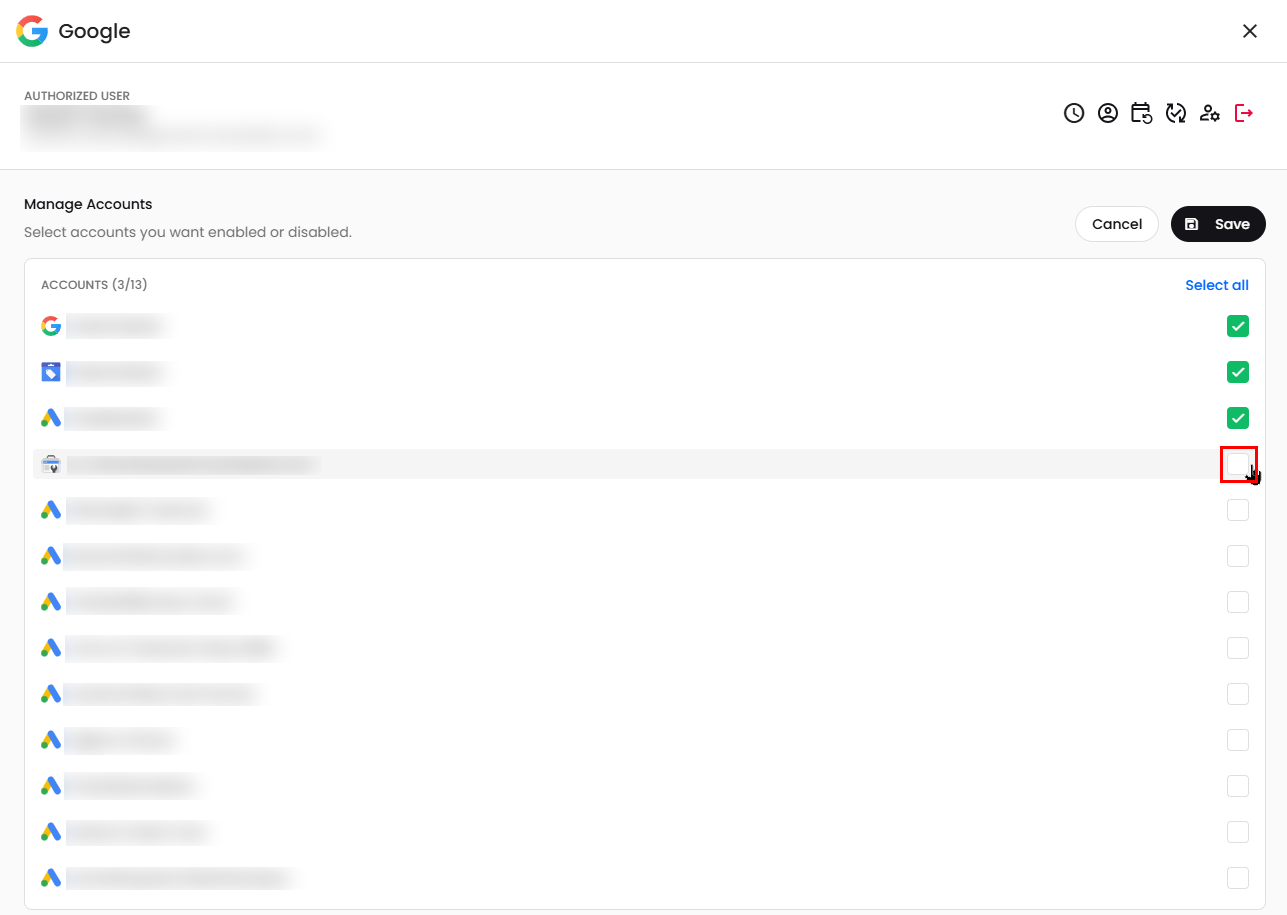
Click the three-dot menu in the Actions column and select Add or remove accounts. The Edit Synced Accounts list opens. (If the Manage Accounts panel is already open, click Add or remove accounts at the top right of the panel.)
Check the box next to the account name you want to include in your data source connection (you can search by account name), or use the checkbox at the top of the list to select all of the available accounts.
Click the black Save button to confirm your selection.
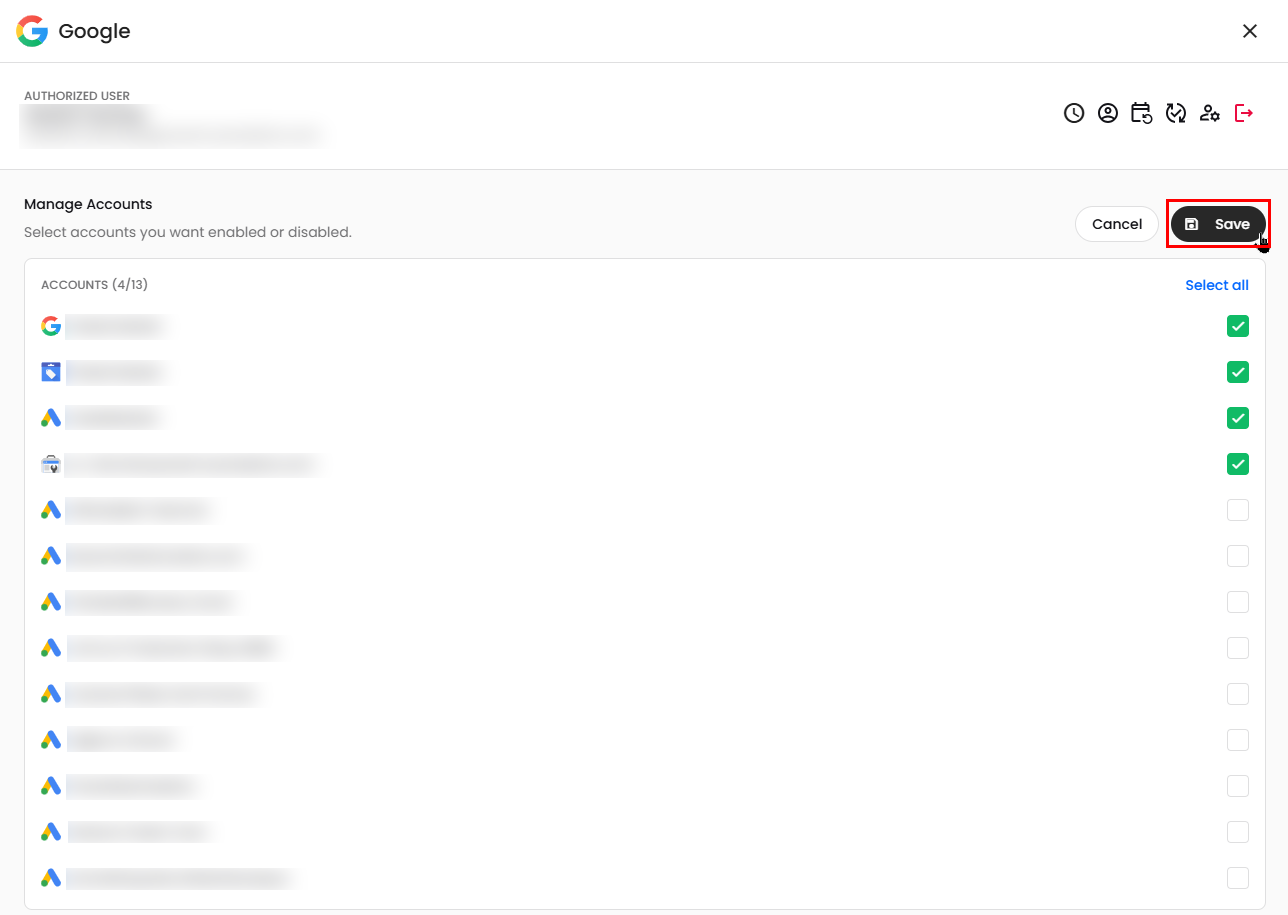
Once enabled, the account will begin backfilling data and will appear in the Manage Accounts main table with a Synced or Syncing status. The newly enabled account data will then be available in your reports and exports.
Note: Don't see the account you want in the list? Select Refresh accounts from the same three-dot menu, then check again. For the full checklist, see Why Can’t I See All of My Accounts in My Hub?
Manage Accounts Main Table
The main table in the Manage Accounts panel displays detailed information about each individual account within your data source.
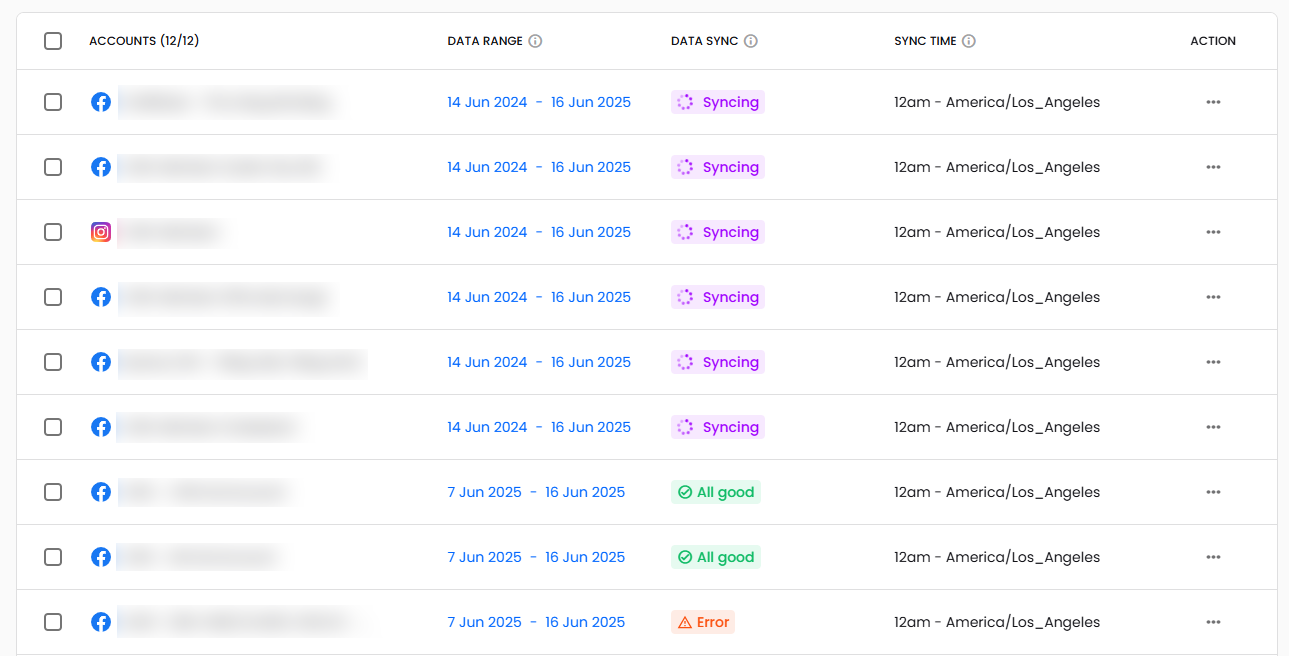
| Column | Description |
|---|---|
| Account Selection | Checkbox for bulk actions on all selected accounts |
| Accounts | Name, email address, and/or unique account identifier of the connected account |
| Data Range | The date range of data retrieved and backfilled for the account during the daily data sync. Accounts with the Lost Access status display "No date range" until access to the account is restored on the source platform. |
| Data Sync | Current sync status of the individual account. Account-level statuses use the same set as source-level statuses; see Understanding Data Source Statuses for full descriptions. |
| Sync Time | The hour and time zone at which the individual account's daily data sync starts |
| Action | Three-dot menu with available actions for each individual account |
Enable Accounts
The Edit Synced Accounts list (opened with Add or remove accounts) allows you to control which accounts within a data source are actively synchronized with Power My Analytics. This is particularly useful for data sources that contain multiple accounts, such as Facebook Ads with multiple ad accounts or Google Business Profile with multiple locations.
How Enabled Accounts Affect Reporting Destinations
When you configure a PMA data source in a destination like Data Studio, the Account multi-checkbox dropdown will only display accounts that have been enabled to sync in your Hub. If you select "All Accounts" in Data Studio:
- The report will include all accounts enabled to sync in your Hub within the connected data source.
- The report will only include accounts PMA currently has access to: accounts with lost access are excluded.
- If access is lost later, any account that PMA can no longer access will be automatically removed from the report along with its data.
This means "All Accounts" represents a dynamic selection that reflects your current enabled and accessible accounts, not a static snapshot of accounts at the time of report creation.
Enable an Individual Account
Click the three-dot menu in the Actions column next to the data source and select Add or remove accounts (or click Add or remove accounts at the top of the Manage Accounts panel).
Check the box next to the account name under "Enable or disable account-level data syncing" to include the account in your data source connection.
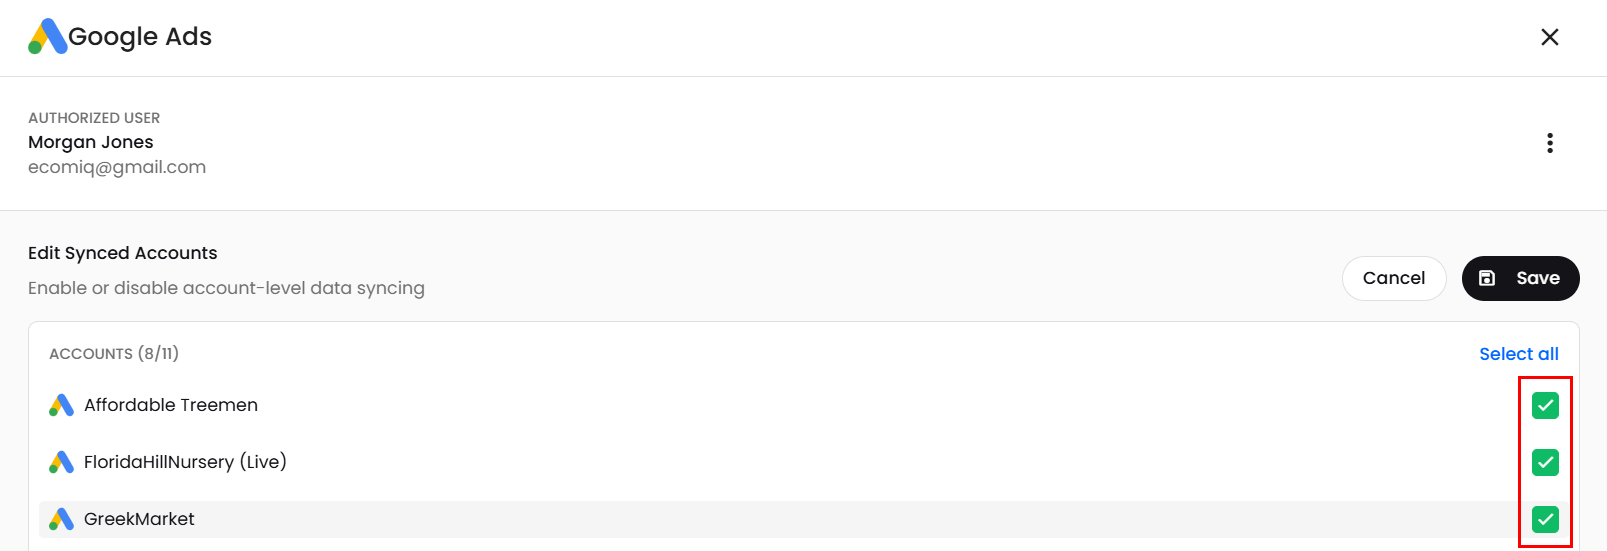
Click the black Save button and the data for the account will begin backfilling.
Disable an Individual Account
- Click the three-dot menu in the Actions column next to the data source and select Add or remove accounts (or click Add or remove accounts at the top of the Manage Accounts panel).
- Uncheck the box next to the account name in the Edit Synced Accounts list to exclude the account from your data source connection.
- Click the black Save button, and the data for the account will no longer be backfilled and cached in the PMA data warehouse.
Accounts with Lost Access
If you lose access to an account on the source platform (for example, if you are removed from a Google Ads account, lose admin permissions on a Facebook page, or are no longer associated with a business profile), that account will behave differently than a manually disabled account:
- The account may still appear in your Hub's Manage Accounts panel but will show the Lost Access status indicating the access issue. The Data Range column for the account will display "No date range" until access is restored.
- The account will not appear as an available option when configuring reports in destinations like Data Studio, Google Sheets, or other integrations, even if historical data for that account exists in your Hub.
- The account will be excluded from "All Accounts" selections in Data Studio, and will be removed from existing reports that included it.
- Historical data for the account remains stored in your Hub, but you cannot create new reports using that account until access is restored.
To Restore Reporting Access
- Verify your permissions on the source platform and request access from the account owner if needed.
- Once access is restored, reconnect the data source in your Hub.
- The account should then reappear in your destination configuration options and be included when "All Accounts" is selected.
Available Actions for Accounts
Click the three-dot menu in the Action column next to any individual account to access these account-specific options:
Backfill data range: Manually backfill historical data for the specific account.
- Data range options: 24 hours, 7 days, 31 days, 3 months, 6 months, 1 year, or custom
History: Opens the comprehensive history of backfilling, data sync jobs, and gaps in data by table for the selected account.
- Chart: Shows a visual history of backfills and their illustrated date ranges over time.
- Jobs: Displays detailed log entries of data sync jobs organized by date.
- Data Gaps: A timeline display showing any gaps of missing data in the account's data stored in PMA's warehouse, organized by tables of fields available in the data source's connector.
Get account information: Copies the diagnostic information associated with the connected account to the clipboard, for use when contacting PMA customer support (includes Organization ID, Account ID, and Sub-Account ID).
Remove account: Remove the individual account from the data source.
When Will My Bill Be Reduced?
Any usage of any connectors during a billing period will be billed for the entire month and will not be prorated. Your bill will reflect the reduction in the first full billing period after the data sources were removed.